How Do I Change Transmission Fluid in a Chevy Silverado 1500?

It almost goes without saying that checking and changing your vehicle’s fluids regularly is essential for keeping it running its best. And when it comes to your Chevy truck, there are a few fluids you should keep an eye on for preventative maintenance. Oil tops the list, of course, but so does transmission fluid, which you might not be as familiar with. If your truck is has an automatic transmission, it’s a good idea to change out its fluid every 50,000 miles. If you have a manual transmission truck, which requires gear oil instead of transmission fluid, speak with your mechanic to learn more.
Automatic transmission fluid acts as both a lubricant and hydraulic fluid. It allows the gears of your transmission to be able to shift properly because it operates the truck’s valve body, which is a component that makes the gears actually shift. It also keeps all of the moving parts lubricated and helps cool the transmission. If you’re considering changing your Chevy Silverado 1500’s transmission fluid, you can follow several simple steps to complete the job safely.
Start by Checking the Transmission Fluid
As automakers continue to modernize vehicles, many cars these days don’t have transmission fluid dipsticks. However, Chevy Silverado 1500 models still have transmission fluid dipsticks that you can check to get a reasonable idea of what the fluid levels are. In order to judge whether it’s time to change your transmission fluid, particularly if you haven’t driven 50,000 miles since the last change, it’s important to look at the level first.
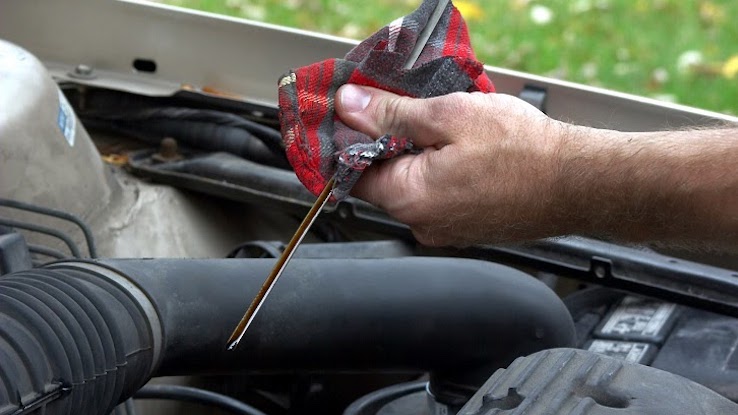
To get started, be sure you check the transmission fluid level when the engine is warm and idling. Make sure no other fans are running before you check the fluid, too. On the Silverado, the transmission fluid dipstick is located near the very back of the engine when you’re looking under the hood. Look towards the center-back area for the pull-tab of the dipstick; there may be a small clip you need to press to release the dipstick.
Pull the dipstick out from the long tube it sits in, wipe it off on a rag or paper towel, reinsert the dipstick and pull it out again. Be sure to hold it level, not upright, to prevent the fluid from running toward the handle and giving you an inaccurate reading. Look at the markings on the dipstick to determine what your transmission fluid levels are.
If your levels are low or the dipstick appears to be dry, you should add fluid immediately. However, remember that this is not the same as changing the transmission fluid — this is simply adding fluid so that you don’t damage your transmission. Changing the fluid out means you’re going to empty the fluid pan and completely replace the liquid.
Gather the Right Tools to Change the Fluid
In order to change the fluid on your Silverado, you’ll need a few things to ensure that the process goes smoothly. It’s easier to perform this type of work if you’re able to put your truck up on a lift, but that’s not a necessity. If you can’t put the truck on a lift, you’ll need to park it on a surface that allows you to roll or crawl under the vehicle easily. Be extremely careful when you’re underneath the truck, and always be sure to have the parking brake engaged.

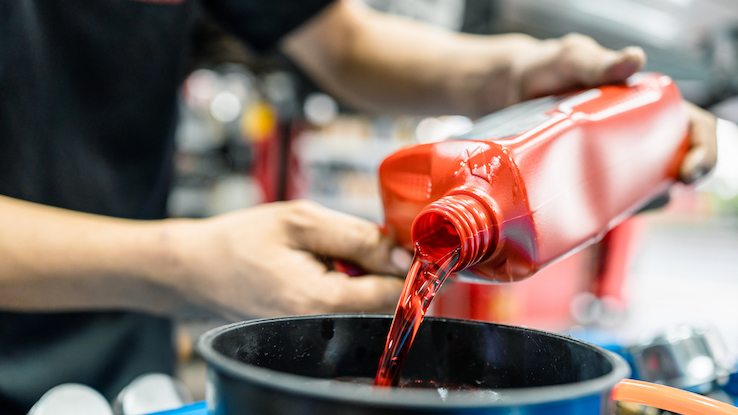
To perform a transmission fluid change, you’ll need a socket wrench, a crescent wrench, a drain pan, a socket set, a degreasing agent, 10 ounces of transmission fluid, a transmission filter and a transmission pan gasket. Keep a few clean rags on hand to wipe up any drips. Consult your Silverado owner manual to learn the type of transmission fluid your truck’s exact model and year takes. Do not use any type of transmission fluid; you’ll need the correct type.
Follow These Steps to Change the Transmission Fluid
To change the fluid, give the truck some time to cool off if you’ve been running it. Then, locate the transmission and its pan underneath the truck, both of which are behind the motor. If there’s a drain plug in the drain pan, you can drain the pan before you unbolt it. Loosen the plug with a crescent wrench, and catch the liquid with a separate pan. Allow all liquid to drain, and then unbolt the pan.
If there is no plug, loosen and unbolt a few of the bolts that connect the drain pan to the transmission. This opens the seal slowly and prevents all the liquid from rushing out at once, which can happen if you remove all the bolts at the same time. Slowly loosen the bolts all the way, remove the drain pan and drain the fluid into a pan.
Place the fluid into a separate container, and clean out the drain pan with engine degreaser. Remove the old filter and install the new filter to the transmission with the socket wrench. Place the gasket on the transmission/drain pan and reattach the pan to the transmission, making sure all bolts are securely fastened.
Once you’ve replaced all the parts underneath the truck and changed the filter, you can add the new transmission fluid where you initially checked it under the hood. Near the transmission fluid dipstick should be a red cap. This is the well where you can add the new transmission fluid. Add about 5 ounces of fluid. Start the truck and run through all of the gears, slowly. Put the truck back into park, and recheck the transmission fluid level. If it still appears low, add the remaining 5 ounces to fill the well.